A couple of years ago, just after I moved into my new house, I applied paint on a metal roof with a roller, but it didn’t last long. And the same incident happened to one of my friends.
After that, I studied through the process and talked with my professional buddies about this topic, and I realized some crucial mistakes that I made, such as taking some pre-steps like proper roof cleaning and taking surface preparations which is crucial in the process.
Besides, before applying the paint, you must consider applying primer, choosing and preparing the paint, the entire painting process, and all the necessary steps. It sounds easy, which is true, but if you don’t maintain a few things, it will all be wasted.
That’s why I discussed everything in detail in the following sections. Let’s get into it!
Quick Jump
5 Benefits of Using a Roller for Painting Metal Roofs
You might already know all these, but here are my thoughts as I’ve experienced them and want to share them with you briefly.
Benefit #1: When you use a roller, it ensures a smooth and even finish on your metal roof. The roller design allows for consistent paint application, minimizing the appearance of brush strokes or uneven patches.
Benefit #2: I like things to be easy, and as for using a roller for a metal roof, the process is straightforward and doesn’t require advanced painting skills. Simply load the roller with paint, and roll it onto the roof using long, even strokes.
Benefit #3: Not just do I want to do things easily, but I want to do them fast. With a roller, you can paint more surface area with each stroke, so you’ll spend less time on that ladder or scaffolding.
Benefit #4: I’m sure you love doing things when they are budget-friendly because I’m too. When it comes to cost, rollers are a budget-friendly choice. They are relatively inexpensive compared to other painting tools, making them a cost-effective option for homeowners or contractors on a tight budget.
Benefit #5: Lastly, I hate wasting even a drop of paint. Using a roller helps minimize paint waste. Unlike brushes that may absorb more paint and leave excess behind, rollers efficiently transfer the paint onto the roof’s surface.
Therefore, not to mention, rollers come in various sizes, allowing you to select the one that suits your roof size. Whether you have a small shed or a large industrial metal roof, a roller will fit the bill.
3 Pre-Steps Before Painting the Metal Roof
Before you get your hands on the painting, some steps and preparation need to be made, such as safety precautions, roof cleaning, and surface preparations. I saw many of my friends getting hurt because of these.
I will go through those one by one.
#1: Safety Precautions
You don’t want to get hurt, and that’s why there are some things you need to check for your protection.
- Gear up with appropriate protective equipment, including safety goggles, gloves, and sturdy shoes.
- Ensure your ladder or scaffolding is stable and securely positioned.
#2: Roof Cleaning
If you want to ensure optimal paint adhesion and a smooth, long-lasting finish, it’s a crucial step to clean your roof.
- Using a broom or leaf blower, you must start by removing debris, leaves, or loose dirt.
- Next, use a pressure washer or a hose with a high-pressure nozzle to wash away stubborn grime, bird droppings, or other residues.
- Pay extra attention to areas with moss or algae growth. In such cases, you might need to use a specialized cleaner or mildew remover to eliminate them effectively.
Lastly, you can’t paint on a wet roof. Allow the roof to dry completely before moving on to the next step.
#3: Surface Preparations
It is the most crucial part of all the steps, as you must ensure that your roof’s surface is in good condition.
- Inspect the roof for any signs of rust or peeling paint. If you spot any, don’t fret! You can easily address these issues.
- Use a wire brush or sandpaper to remove rust spots, scaling paint, or loose particles. Take your time and be thorough. The better the surface preparation, the better the result.
- For areas with severe rust, consider using a rust converter or primer specifically designed for metal surfaces. These products help neutralize rust and provide a solid foundation for the paint.
After dealing with all that, clean the surface again to remove any dust or debris that may have accumulated during preparation.
That’s all you can do before painting your metal roof with the roller. Ensure to do those, and you’re good to go!
4 Steps to Paint a Metal Roof with a Roller
After finishing all the pre-steps, you can paint your metal roof with a roller. You must be careful even after taking all the safety precautions.
Step #1: Applying a Primer
The first step is not always necessary, but applying a primer before painting a metal roof is better.
But, if your metal roof has never been painted before or if you’ve removed rust, you must apply a primer.
- You should choose the Right Primer. Look for a high-quality primer specifically designed for metal surfaces.
- Start by stirring the primer thoroughly using a paint stirrer.
- As you use a roller, dip it into the primer, ensuring it is evenly coated but not overloaded.
- Roll the primer onto the metal roof using long, overlapping strokes. When working in small sections, typically 3 to 4 feet wide, maintain a wet edge and avoid visible roller marks.
After you’re done with the entire roof, let it dry. Typically, it takes a few hours to dry, but it’s best to wait until it is fully cured before applying the paint.
Step #2: Choosing the Paint
As you might know, different types of metal roofing materials, such as steel, aluminum, or copper, may have specific paint requirements. You must ensure that the paint you choose is compatible with the metal on your roof.
Before choosing the right paint for your metal roof, here are the things you should consider.
- Look for paints specifically formulated for exterior use, designed to withstand harsh weather conditions, temperature changes, and UV rays without fading or peeling.
- If you live in a hot climate, you may want to explore the option of reflective or cool roof coatings, as they have high solar reflectance, helping to keep your roof cooler and reducing energy costs by minimizing heat transfer into your home.
- Especially if your metal roof is prone to rust, look for paints with rust-resistance properties.
- Paints should be high-quality binders and pigments that provide excellent weather resistance if you don’t want to change them just after a few months.
No matter which metal material is used on your metal roof, such as aluminum, copper, galvanized steel, zinc, corrugated metal, standing seam metal, tin, or stainless steel, for all these types, acrylic or latex-based paints is suitable.
But, besides that, Polyurethane coatings and silicone-modified polyester coatings are also suitable if your metal roof material is steel, aluminum, or copper.
Step #3: Preparing the Paint
As you’re done with choosing the right paint, now you need to prepare it properly.
- Open the can of paint.
- Mix the contents thoroughly with a sturdy paint stirrer or a wooden stick.
- While stirring the paint, keep an eye out for its consistency. Ideally, the paint should have a smooth and creamy texture and check for consistency.
- Sometimes, you might find the paint too thick for your liking or your project’s specific conditions. Thinning the paint can make it easier to work with, especially when using a roller.
- Usually, you’ll need to add a compatible thinner or water to the paint. Pour the paint into a clean container, add the recommended amount of thinner, and mix it thoroughly.
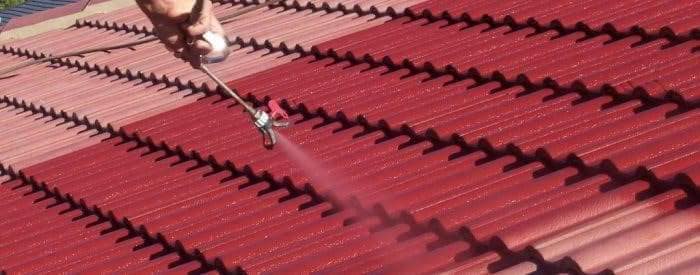
Step #4: Painting Process
In this section, let’s get started with the painting process for your metal roof.
- To begin, choose a roller specifically designed for smooth or semi-smooth surfaces.
- But you can also use a medium-nap roller, which provides good coverage without leaving excessive texture.
- Dip the roller into the paint tray.
- Start rolling the paint onto the metal roof using long, even strokes.
- Apply steady, gentle pressure as you roll. Too much pressure can cause paint to splatter, while too little may result in insufficient coverage.
Besides, keep a close eye on the painted surface to ensure you achieve an even coating. And, If you notice any areas with thinner coverage, go back over them while the paint is still wet to achieve a uniform appearance.
Lastly, many people prefer using a second coat for complete coverage. That’s completely up to you if you want to go with it.
After applying the paint, you should give it some time to dry. Here is a table for you to understand.
| Weather Conditions | Touch Drying Time | Recoat or Rain-safe Drying Time |
| Dry and Warm (Ideal) | 2+ hours | 24-48 hours |
| Mild and Humid | 4-7 hours | 72+ hours |
| Cold and Damp | 8-14 hours | Four days |
Wrap Up
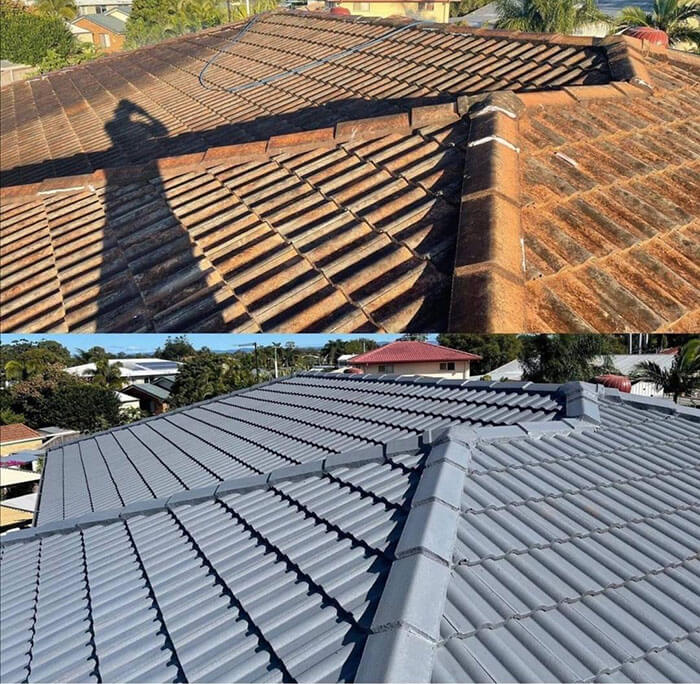
That’s all from me for now. Properly maintain those pre-steps and ensure the roof or the surface is prepared for paint. After that, you can use a primer and choose and prepare your paint for use in your metal roof.
Let the paint dry for the recommended time, and your roof will look shiny and new. Good Luck!

Roger Lewis is an experienced roof repair contractor with over 15 years of industry experience. He is known for his expertise in all aspects of roof repair, including leak detection, shingle replacement, and gutter repair.